Behind the Scenes
This section serves to fill in some of the things I left out in the V1 and V2 building guides because they aren’t strictly necessary to know if the intent is “just” to build a copy of what I had created. Hopefully, since you’re choosing to read on, you’ll find it interesting!
Figuring out what network calls get made when the guest wifi password is changed
In order to make this project work, I needed a way to programmatically change the wifi password.
Given that I would have a Raspberry Pi and Python as tools in my toolbelt, I decided to go through the process of manually changing my password, noting the HTTP requests that my browser made, and then recreating those in code.
This means that the code that I wrote will only work for the networking hardware that I have, but it wouldn’t be difficult to replicate this for other setups (I just don’t know what it would look like because I don’t have other routers to play with).
I opened up the development tools in my browser and logged in to my network management interface (often at 192.168.0.1, 192.168.1.1, or 10.0.0.1) taking note of what my browser did as I performed those actions.
In this case, the first thing I noted was that my login was an HTTP POST to the /api/auth/login endpoint.
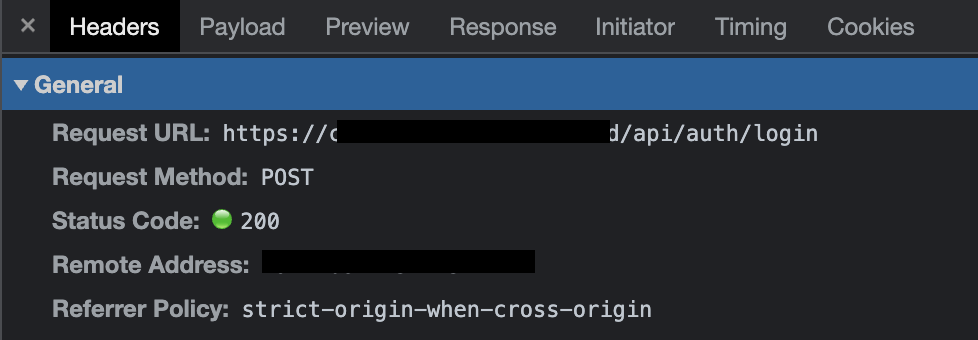
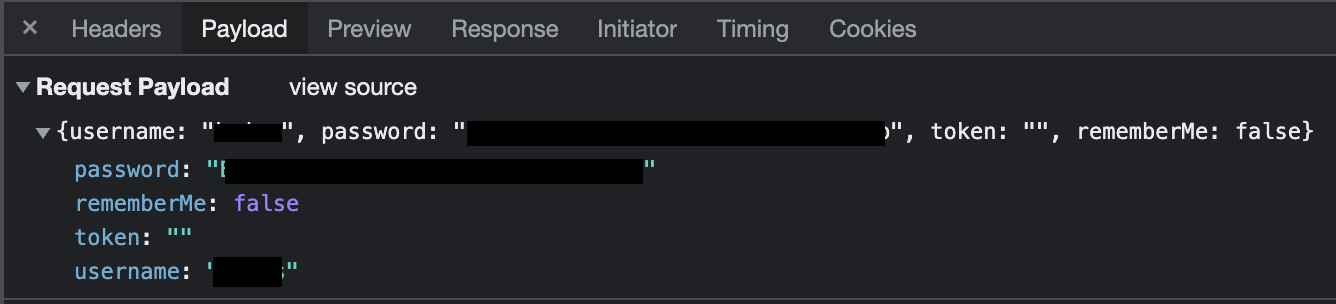
In the login request’s payload, were both the username and password that I had typed in.
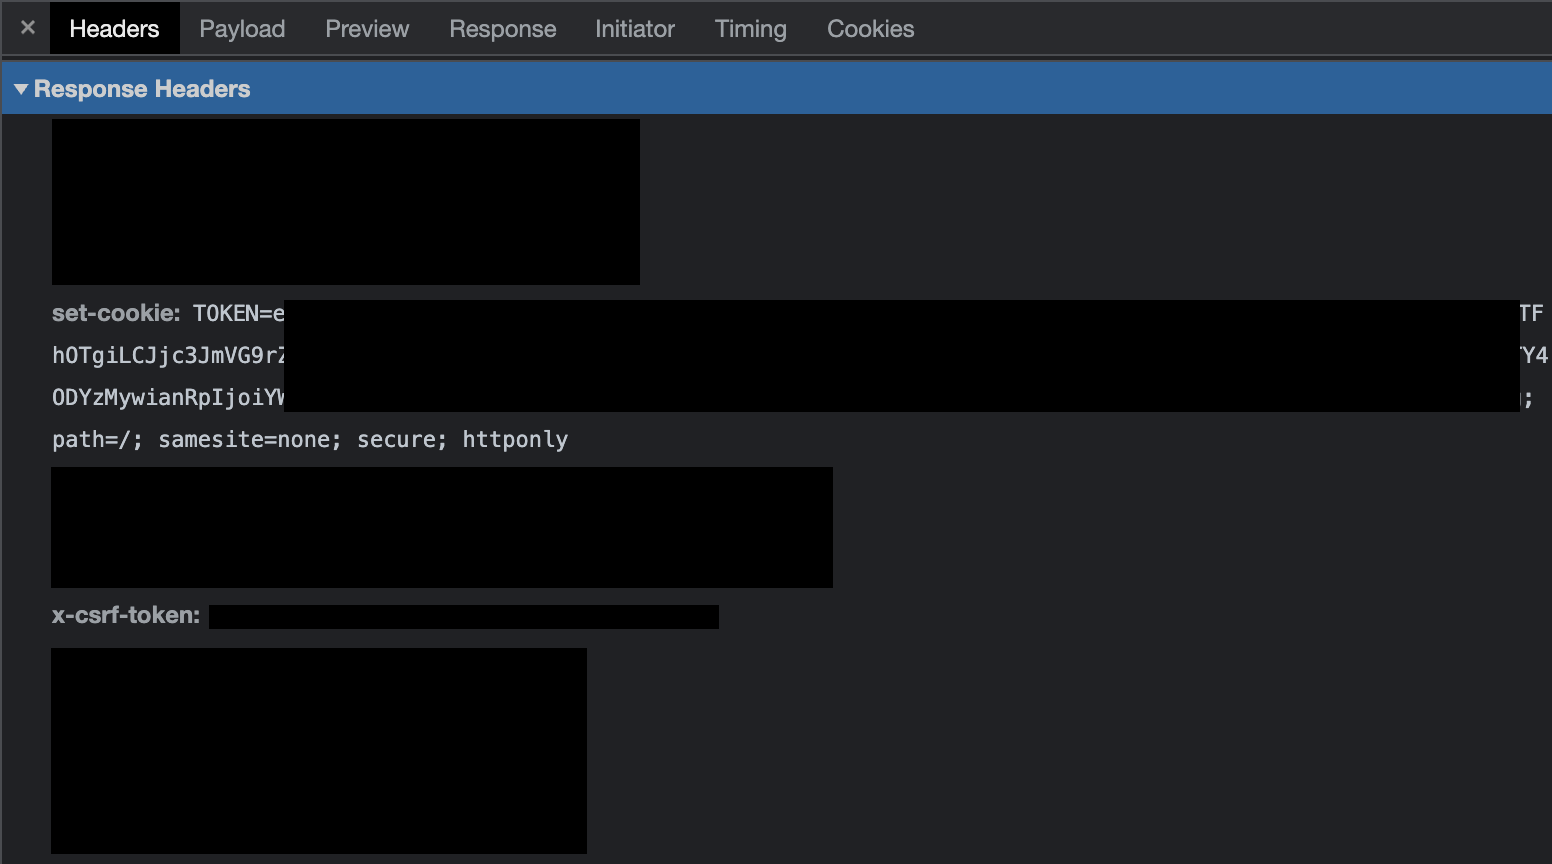
And finally, in the response to my login request, I saw both a set-cookie and a x-csrf-token value. Both of these are required in subsequent requests to my management interface so that it knows that I am still an authorized user.
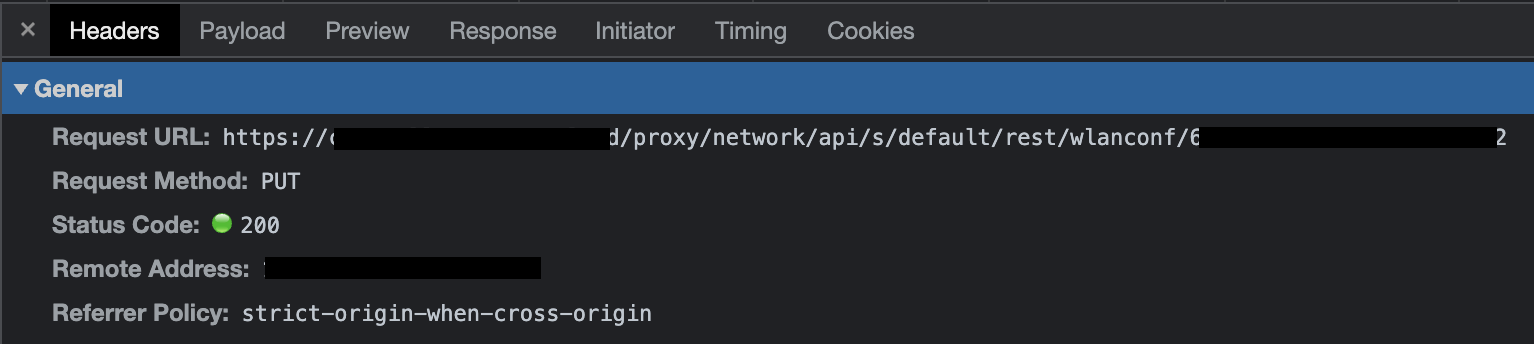
Then I manually changed the Guest wifi password, again noting the requests my browser made and the parameters it sent.
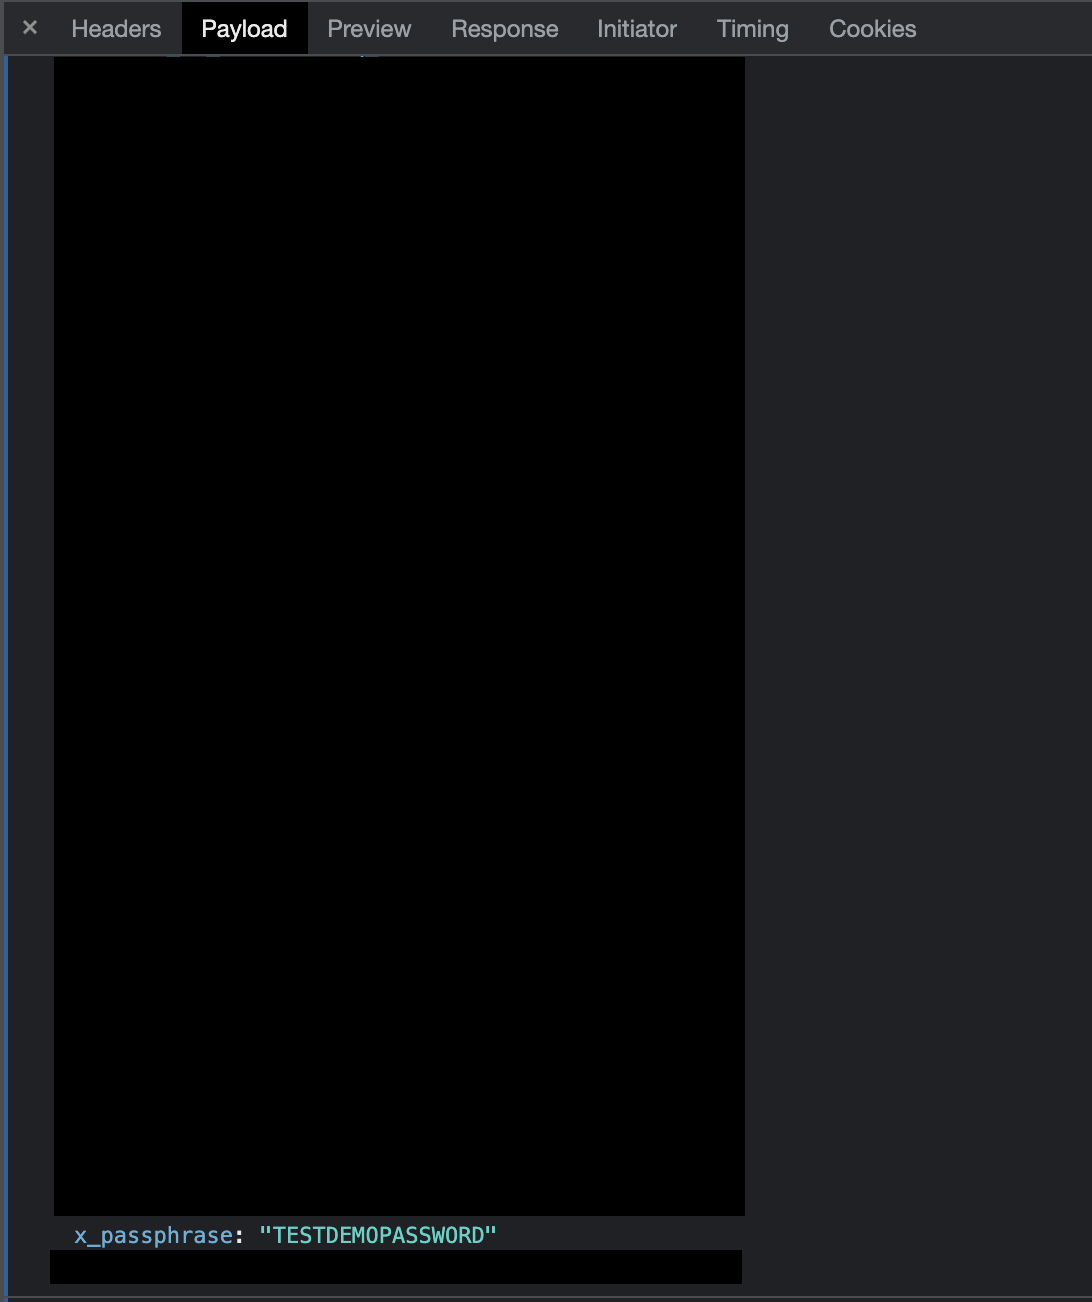
The password changing request was an HTTP PUT to an endpoint that contained a string specific to my Guest wifi, /proxy/network/api/s/default/rest/wlanconf/SPECIFICSTRING.
The only parameter that mattered in the password change request’s payload was the x_passphrase field, which contained the password I had entered.
Writing Python code that can change the guest wifi password
Having made these two network requests and copying down all the things that they sent (and the responses they got), I was armed with what I would need to write the code to do it automatically. The basic flow I would need is as follows:
- Log in by sending username and password to the
/api/auth/loginendpoint - Save the
set-cookieandx-csrf-tokenvalues - Use the
set-cookieandx-csrf-tokenvalues to send the desiredx_passphraseto the/proxy/network/api/s/default/rest/wlanconf/SPECIFICSTRINGendpoint
The router_clients.py file in the be_my_guest repo does exactly that. I added a bit of scaffolding around the requests that would make it easier for me to extend the project to support other routers,
but the initialization of the UnifiClient class makes the login request with the username and password combination, then extracts the cookie and token required for subsequent requests.
It conveniently has a session field that allows the class to make later calls without needing too much setup.
The UnifiClient also provides a change_wifi_password method that does exactly that; given the target network and desired password, it uses the active session to make a PUT to /proxy/network/api/s/default/rest/wlanconf/SPECIFICSTRING.
The discovery steps in the previous section combined with the coding steps in this section can be replicated in order to achieve a very basic Python password changer for other network setups.
From there, generating a random string for a password, formatting it in a way that allows a QR code to log in a mobile device, and displaying the QR code to a screen are all handled in the update_wifi.py file.
There shouldn’t (famous last words) be any need to change that code, as it should (there’s that word again) be hardware-agnostic.
Digispark programming and capabilities
Everything was all well and good with version 1 of be_my_guest until May 2022, when my wife’s parents stayed with us for a few days.
They were the first guests of mine who brought a laptop, and I didn’t have a good way to log it in to the Guest wifi; a major oversight on my part.
Fortunately for me, I had a small stash of Digispark ATTINY85s that I had bought and mostly forgotten about as I never had a “good” reason to invest time in them.
Digispark ATTINY85s can be programmed such that they perform actions similar to the badUSB and related USB Rubber Ducky tools which is why I bought them, but then they gathered dust waiting for me to have a reason to use them.
I figured that logging into wifi seemed like a great use for these little boards, and got to work learning about how to program them.
Though my understanding is not too deep, the basic idea is that these boards are programmable for about the first 5 seconds they are plugged in to a machine, beyond which they enter a “run mode”, where they actually do the thing they were programmed to do.
This means if I could control the power to the USB port it is plugged into, I could artificially unplug and replug it, allowing me to update whatever its “run mode” would be when another person plugs it in to their device.
I found that the DigiKeyboard.h library makes it simple to have the ATTINY85 send keystrokes to a device, so I got to work programming tests.
One thing I found is that in order to take full advantage of the (still small) space on the ATTINY85, I had to use the avr/pgmspace.h library and play a few games copying strings around in memory.
Although that isn’t strictly necessary for the purposes of writing a 30-character wifi password to a target device, I used this approach in the arduino_string.py template string because eventually I’d like to be able to make the login process even easier for my guests, and I suspect I will need to use the full capacity of the board to do it.
I also noted in a comment in the string a link to the guide that originally taught me how to do this (and I’ve saved it on the wayback machine as well, just in case).
The high-level explanation of what I did to update the ATTINY85 is as follows:
- Python code and a template string helps me re-write the C program that will eventually be run on the board
arduino-clicompiles that C program so that it can be executeduhubctlturns off the power to the USB port that the board is plugged into, waits 5 seconds, then turns it back onmicronucleusruns a command in the small window that the USB port is turned off to reprogram the board; when it gets powered back on it is reprogrammed